Wednesday, April 3, 2013

Magic Chocolate Flan Cake


Today's sweet treat is really special: Magic Chocolate Flan Cake. Yum! The name itself is good enough to eat.

In this recipe, tender, homemade flan is perched on a scrumptious layer of rich chocolate cake drizzled with warm caramel sauce. Built in a Bundt pan, this mouthwatering dessert is not only elegant, but "magical" too. First, you coat the bottom of the pan with a thin layer of the caramel; next, you add the cake batter; last of all, you pour in the liquid flan. Then, while the dessert bakes in the oven, the cake and flan layers miraculously swap places! Some say this process is purely science, but I like to think it's my little kitchen elves hard at work. :)


I won't mislead you--this wasn't the easiest baking project I've ever done. I started mixing ingredients at 8 in the morning, and we ate our first piece around 11 PM. There's also quite a bit of patience required--not to mention dishes to be washed--but trust me, the end result is completely worth the effort. You just can't beat the "wow" factor of this marvelous cake once it's sitting on a serving tray in front of guests. Just be sure to save a slice for yourself!

Happy baking!

Layer 1: Caramel Sauce


Magic Chocolate Flan Cake
From Cook's Country magazine, January 2013 issue

Cake
1/2 C caramel sauce or topping
1/2 C plus 2 T all-purpose flour
1/3 C cocoa
1/2 tsp. baking soda
1/8 tsp. salt
4 oz. bittersweet chocolate, chopped
6 T unsalted butter
1/2 C buttermilk
Layer 2: Chocolate Cake
1/2 C sugar
2 large eggs
1 tsp. vanilla extract

Flan
2 (14-oz) cans sweetened condensed milk (Borden Eagle Brand recommended)
2 1/2 C whole milk
6 oz. cream cheese
6 large eggs plus 4 large yolks
1 tsp. vanilla extract

FOR THE CAKE: Adjust oven rack to middle position and heat oven to 350 degrees. Grease 12-cup nonstick Bundt pan. Microwave caramel until easily pourable, about 30 seconds. Pour into pan to coat bottom. Combine flour, cocoa, baking soda, and salt in bowl; set aside. Combine chocolate and butter in large bowl and microwave at 50 percent power, stirring occasionally, until melted, 2 to 4 minutes. Whisk buttermilk, sugar, eggs, and vanilla into chocolate mixture until incorporated. Stir in flour mixture until just combined. Pour batter over caramel in prepared pan.

Layer 3: Homemade Flan
FOR THE FLAN: Process all ingredients in blender until smooth, about 1 minute. Gently pour flan over cake batter in Bundt pan and place pan in large roasting pan. Place roasting pan on oven rack and pour warm water into roasting pan until it reaches half-way up side of Bundt pan. Bake until toothpick inserted in cake comes out clean and flan registers 180 degrees, 75 to 90 minutes. Transfer Bundt pan to wire rack. Let cool to room temperature, about 2 hours, then refrigerate until set, at least 8 hours. (Remove roasting pan from oven once water has cooled.)

Place bottom third of Bundt pan in bowl of hot tap water for 1 minute. Invert completely flat cake platter, place platter over top of Bundt pan, and gently turn platter and pan upside down. Slowly remove pan, allowing caramel to drizzle over top of cake. Serve.


Sunday, February 10, 2013

Valentine Cake & Sprinkles Snacks


Happy Valentine's Day!

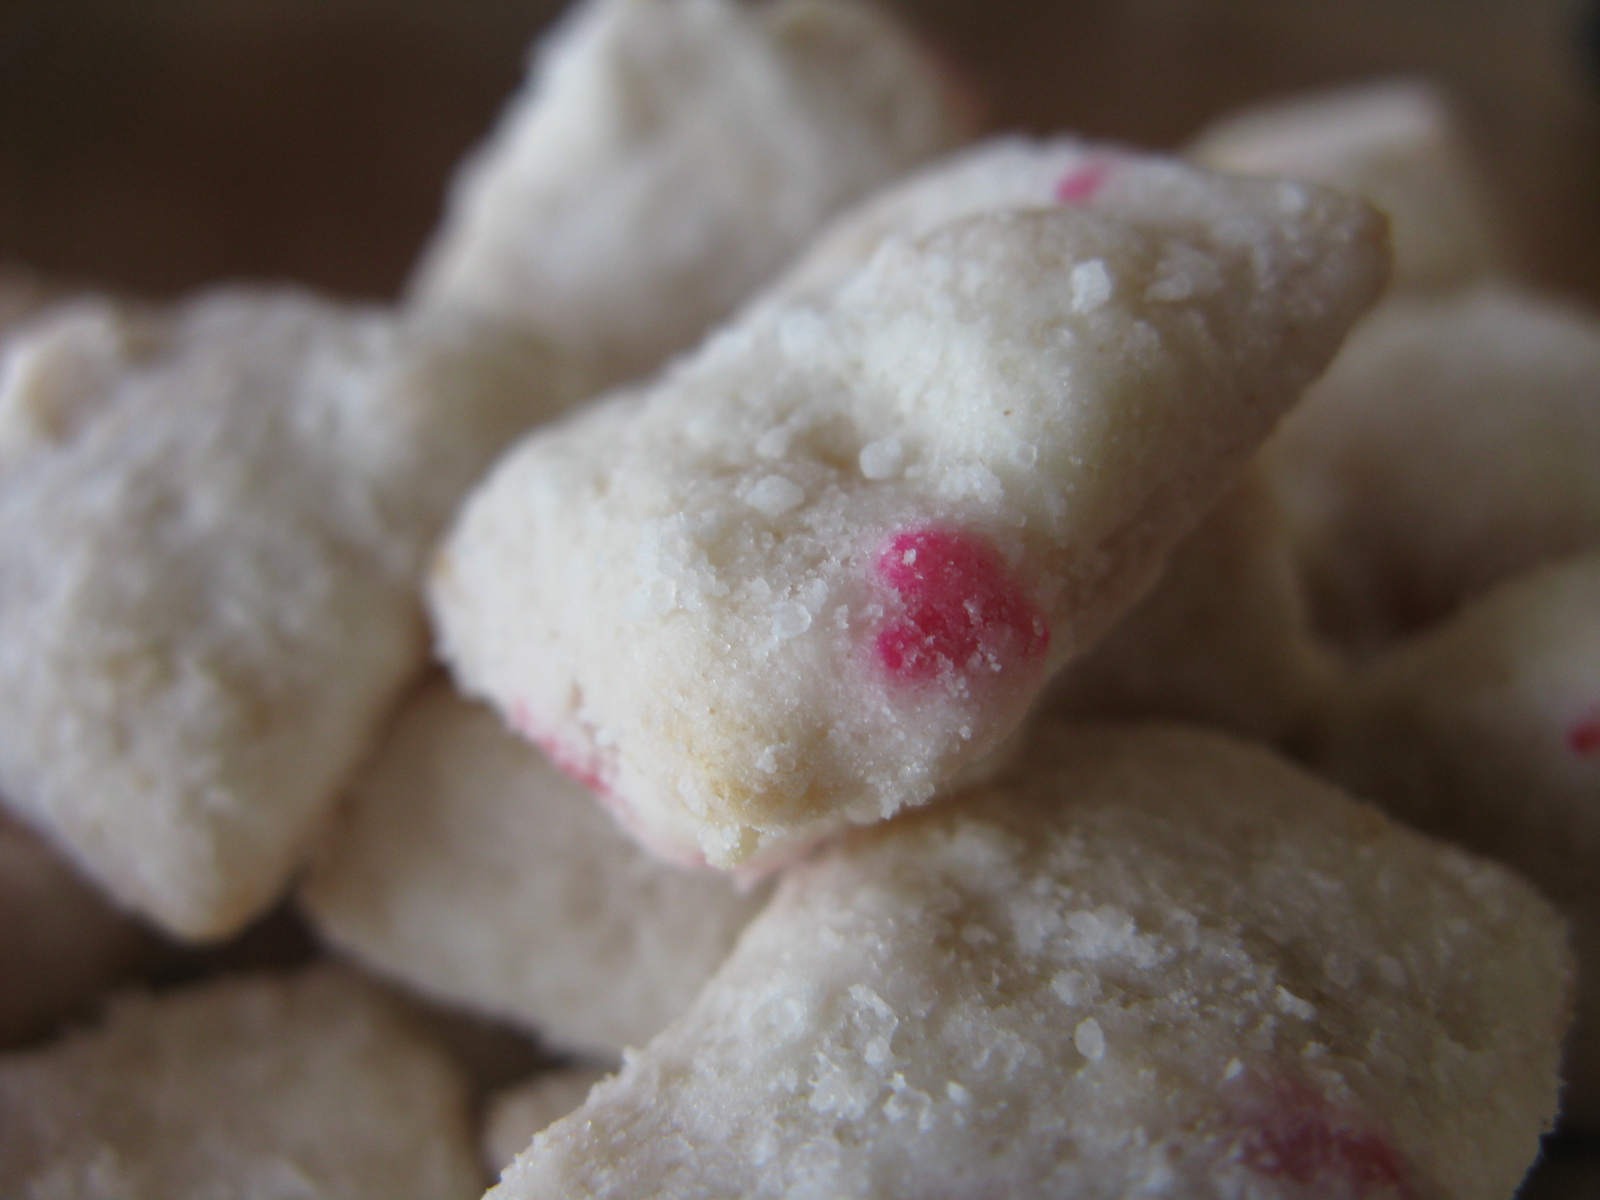
This year, say "I love you" with a perfectly delicious, oh-so-sweet batch of Valentine Cake & Sprinkles Snacks! Remember making puppy chow or Muddy Buddies as a kid? That's what these little guys are like--just swap the peanut butter and chocolate for white confection and cover with powdered sugar and cake mix! Yummy!

It's easy to love these tiny snacks. They're easy on the wallet, since you likely have a lot of the ingredients on hand. They're simple and super fast, so they're great if you're in a time crunch. Best of all, you can tailor these treats to suit any occasion: pink and blue sprinkles for a baby shower, snowflake sprinkles and red velvet cake mix for Christmas, etc. I'd love to hear all about the fun twists and turns on which you take this recipe!


Divvy them up to classmates and co-workers in little cellophane bags tied with pink ribbon or take out boxes covered in shiny heart stickers. Toss them together with pretzels and marshmallows for a party mix worthy of any church gathering or Cub Scout activity.

The original recipe for this goody comes from my mom, who found it here. Please check out the site, as it has so many cute, cute, cute recipes and photos! In the end, I tinkered with the original recipe a bit, based on the upcoming holiday and what I had in the cupboard. Here we go:


Everything you need (minus the white candy melts--oops!)
Valentine Cake & Sprinkles Snacks

5 C Chex cereal
5 oz. white candy melts
5 oz. white chips
3/4 C cake mix (I used Funfetti, but any white cake mix will do)
1/4 C powdered sugar
Heart sprinkles (I used Wilton Micro Hearts)

Pour cereal into large bowl.

Melt white candy melts and white chips in microwave, stirring well. Be sure chocolate doesn't scorch. Carefully fold white confection mixture into cereal until cereal is completely coated. Generously shake sprinkles over mixture, using same folding technique.


Pour cake mix and powdered sugar into gallon-sized zip-top bag and shake well. Pour cereal mixture into bag and shake until cereal is completely coated.

Tuesday, January 22, 2013

Peanut Butter Oatmeal-Chip Cookies

OK, you got me. I just can't keep it a secret, so I'll just blurt it out: I discovered the recipe for Love Potion #9.

Get this--it's not a frilly cocktail, nor is it an expensive elixir in an ornate glass jar. This "potion" is a batch of homemade, melt-in-your-mouth peanut butter oatmeal-chip cookies. They might not make anyone fall in love, but you'll definitely fall for them.


Here's the deal: after one bite of these scrumptious, chewy, ooey-gooey delights, I was in heaven. Pure heaven. Which was funny, because there was no way anything this sinfully delicious could be so good. I can never eat another store-bought, prepackaged cookie again, and I can't imagine a better food to serve when you want love in the air.

In other words:

YOU.

MUST.

MAKE.

THESE.

COOKIES.

Your taste buds will forever thank you. Your loved ones will beg you to bake them again...and again...and again. After all, there's something simply magical, something wonderful, about marrying peanut butter with chocolate--all that sugar and salt combining together to form the ultimate in rich, creamy comfort food. These cookies take that decadence even further, with the addition of crunchy oatmeal and both white and brown sugars, creating the perfect treat for a romantic occasion.


Peanut Butter Oatmeal-Chip Cookies
From Taste of Home Best-Loved Cookies & Candies, 2012

2 1/2 C butter, softened
2 C sugar
2 C packed brown sugar
1/2 C creamy peanut butter
4 eggs
2 tsp. vanilla
6 C all-purpose flour
2 tsp. salt
2 tsp. baking soda
1/2 tsp. baking powder
1 12-oz. pkg. semisweet chocolate chips
1 11-oz. pkg. peanut butter and milk chocolate chips
1 C quick-cooking oats

In a large bowl, cream the butter, sugars, and peanut butter until light and fluffy. Beat in eggs and vanilla. Combine the flour, salt, baking soda, and baking powder; gradually add to creamed mixture and mix well.

Stir in the chips and oats. Drop by rounded tablespoonfuls 2 in. apart onto ungreased baking sheets. Bake at 375 degrees for 9-12 minutes or until golden brown.

Cool for 2 minutes before removing from pans to wire racks. Store in an airtight container.

Monday, January 7, 2013

Pretty Poinsettia Cookies


Happy New Year, bakers and cakers!

First of all, I hope you all had a safe and joyous holiday season and that 2013 brings you only the best, both in and out of your kitchen. There are so many ways to celebrate this festive time of year--yet, in my book, there's nothing as sugary sweet as some good, old-fashioned baking to make the holidays just perfect.

This season, I was delighted to make six types of Christmas cookies: strawberry, chai spice, peanut butter oatmeal chip, iced sugar, chocolate mocha, and these adorable little guys shaped like poinsettias. (As you can see, I had a very eager baker's apprentice, aka my wonderful nephew, assisting my husband and me. Our little cutie did a terrific job, especially since it was his first time baking!)

These poinsettia cookies are so delicate and lovely, but the best part about them is their versatility. Since it was Christmas, I decorated these little treats with a red and green color scheme of sprinkles and cherries. Substitute those garnishes for pastel candies and non pareils, however, and these holiday poinsettias turn into a gorgeous Eastertime bouquet. Blue, green, and orange flourishes change them into beautiful blossoms befitting a birthday, brunch, or any "just because" occasion. Play around with the toppings as much as you wish--try swapping the candied cherries for jellybeans, gumdrops, or M&Ms, for instance. I'd love to know what kinds of fun and creative combos you all cook up!

I made a couple of small changes to the original recipe, which you can find here. First, I switched around the amounts of almond and vanilla extracts, as my hubby loves almonds, but not almond flavoring! This switcheroo gave the cookies a more subtle, but not bland, taste. Additionally, I left the candied cherries whole rather than quarter them. I'd love to say that I had a good reason for this, but, quite frankly, I just forgot. :) In the end, I like the way the whole cherries "pop" off the cookies, and if it saved me a step, why not?

Pretty Poinsettia Cookies
Adapted From The Taste of Home Baking Book, 2007

1 C butter, softened
1 C confectioner's sugar
1 egg
1 tsp. almond extract
1 1/2 tsp. vanilla
2 1/2 C all-purpose flour
1 tsp. salt
Red and green decorator's sugar
Red and green candied cherries

In a large mixing bowl, cream butter and sugar until light and fluffy. Add egg and extracts; mix well. Combine flour and salt; gradually add to creamed mixture. Divide dough in half; wrap in plastic wrap. Chill overnight or until firm.

On a lightly floured surface, roll out one portion of dough into a 12". x 10" rectangle, about 1/8" thick. Cut into 2". squares. In each square, make 1" slits in each corner. Bring every other corner up into center to form a pinwheel; press lightly. Sprinkle cookies with red and green sugars and press a candied cherry into the center of each.

Place 1" apart on ungreased baking sheets. Bake at 350 degrees for 10 minutes. Cool 1-2 minutes before removing to a wire rack.


Wednesday, September 5, 2012

Whimsical Watermelon Cookies

Ahhh, summer. I love your hot, sticky days filled with ice cream  and carnival rides. I love your wildflowers, your woodland hikes, your bike rides around the lake. I savor each of your sun-kissed mornings like I savor the fresh veggies and honey I find at the farmers' market. But now Labor Day has come and gone, drawing this magical season to a close. So, while I can't stop time, I gave summer one final hurrah by baking a batch of delicious watermelon cookies.

Soft, sweet, and cute as a button, watermelon cookies are perfect for your next family picnic, block party, or casual night on the porch. But why wait to serve them at your next summer shindig? Turn heads this fall by including these adorable treats at your next cookie exchange or bake sale! Kids and grown-ups alike will love the tasty watermelon "seeds" and glittery sugar "rind," which makes these cookies great for many occasions.

Here's the recipe I used, which I adapted from www.meganscookin.com. Please don't be intimidated by the length of this recipe; these guys really are easy to make and only require a little patience. If you're pressed for time, I'd bet you could even substitute your own sugar cookie recipe and just follow the instructions below for creating the watermelon shapes. Also, don't worry if you can't find green candy coating--melted white chocolate chips mixed with green food coloring works just as well.


Watermelon Cookies
1 C cold unsalted butter, cut into 1/2 tablespoon slices
1 1/2 C granulated sugar
2 eggs
1 tsp. vanilla
6-8 drops red food coloring (more for deeper pink color)
3 3/4 C cake flour
1 tsp. baking powder
1/2 tsp. salt
1/2 C. Wilton Green candy coating
1/2  C Wilton Vibrant Green candy coating
Green pearlized sprinkles
Miniature semisweet chocolate chips

In bowl of stand mixer, beat together butter, sugar, eggs, vanilla, and red food coloring. Keeping mixer on low speed, gradually add cake flour, baking powder, and salt and mix well. Remove dough from bowl and divide into two equal halves. Place one dough ball between two sheets of wax or parchment paper. Using a rolling pin, roll dough to 1/4" thickness. Repeat with other dough ball. Stack both sheets of dough on a cookie sheet and chill in the refrigerator for at least 2 hours.


Preheat oven to 350 degrees. Remove dough from refrigerator. Using a circular cookie cutter or biscuit cutter, cut out circles from dough.* Cut each circle in half using a sharp knife or dough scraper. Place cookie halves on parchment-lined baking sheet about 1/2" apart. Gently press mini chocolate chips upside down into each cookie half. Bake for 8-10 minutes. Cookies are done when they are slightly puffed, but not browned. Remove cookies from oven and let cool on baking sheets 5 minutes. Remove to wire rack and let cool completely.

Melt candy coating in microwave for 1 minute according to package directions. Place sprinkles in a shallow bowl. Working with one cookie at a time, dip the round end of cookie into green candy coating to create a watermelon "rind." Wipe off excess coating. Roll "rind" in sprinkles and let dry on wax paper. Enjoy!

* I used 2 1/2" and 3" diameter scalloped edged biscuit cutters for a variety of cookie sizes, although the smaller cookies baked more evenly than the larger ones. Plain round cookie cutters in slightly different sizes work too--just be sure to adjust oven temps and times as necessary. You can even use a tiny scalloped cutter to make itty-bitty "bite marks" in some of your watermelon slices!

Monday, October 31, 2011

"Psych"-Inspired Cinnamon Pie


I have a confession. I am completely hooked on "Pysch"--you know, that ridiculously crazy, crazily good, pseudo-pyschic comedy-drama mystery series on USA. It's this new obsession that I discovered a few weeks ago thanks to my husband and the good people at Netflix. Last week, we watched the "Dual Spires" episode, in which Shawn and Gus go to a small town to attend a cinnamon festival, but stay for the cinnamon pie (not to mention the not-unforeseen murder investigation).Comedic and investigative antics aside, the homemade cinnamon pie in the episode was impossible to forget. It was mouthwatering. It was sweet. But most of all, it was addictive. I had to try it.

There are a few cinnamon pie recipes floating around the Internet, but this one from Allrecipes seemed to have the most promise. Boy oh boy, was this ever a good pie. Springy with a mild autumnal flavor, this custardy confection was a great little afternoon perk-me-up. I imagine it'd be just perfect with coffee, tea, or a scoop of ice cream.

But I've got to admit, it wasn't quite what I was hoping for. I envisioned an extremely rich, creamy pie with a deep cinnamon flavor and gritty texture that allowed you to taste individual sugar granules. I wanted something so strongly aromatic, I'd feel like I was in Dual Spires, something so sweet my teeth might fall out...OK, so maybe not that sweet.

Next time (and there will definitely be a next time!), I think I will try a less flaky crust, substitute the milk for half-and-half or heavy whipping cream, and add another half teaspoon of cinnamon. Maybe I could even use some brown sugar. In the mean time, try the original Cinnamon Pie recipe I used and see what works best for you!

Cinnamon Pie (Courtesy Sharon Miller, allrecipes.com)
1 C sugar
1 1/2 T all-purpose flour
1 tsp. ground cinnamon
1 pinch salt
1 egg, beaten
2 T butter, melted
1 tsp. vanilla extract
1 1/2 C milk
1 10-inch unbaked pie crust


Preheat oven to 400 degrees F. In a large bowl, combine the sugar, flour, cinnamon, and salt. Add the beaten egg, butter, and vanilla. Mix well and add the milk. Pour mixture into an unbaked 10-inch pie crust (glass pie plate is best). Bake at 400 degrees for 15 minutes, then reduce heat to 350 degrees F and bake for and additional 45 minutes. Let cool and serve. Refrigerate any leftovers.

Tuesday, October 25, 2011

Fresh Apple Butter

Autumn lays out a lovely landscape here in Minnesota. Vast, open cornfields transform into brilliant seas of vibrant squash and jeweled pumpkins. Trees erupt in elegant burst of burgundy, tangerine, and gold. School children run about the suburbs excitedly, chattering about hayrides and Halloween costumes and who's who this year at school. There are bonfires, ball games, and stacks of cinnamon-scented pinecones at Bed, Bath, and Beyond.

This year, my husband and I kicked off the season with a trip to the Minnesota Harvest apple orchard in Jordan. We picked two pecks of apples--one Honey Gold and one Haralson, which we heard were good baking apples.

My husband then let his baking skills shine by turning our two pecks of apples into twelve apple pies! (By the way, I was the lucky duck who got to peel all of those apples.) :) Keeping in the spirit of things, I whipped up my own batch of apple-flavored goodies: my mom's Microwave Apple Butter. (We actually went to the market and bought an extra bag of Gala apples for this recipe.)

Our microwave apple butter and homemade apple pie
If you're a fan of apples--or just all things autumn--you'll love the warm, spicy aromas that fill your kitchen when you make this recipe. It's so simple, you could make this in a dorm room without any fancy equipment or gadgets. The texture is something like applesauce, but perhaps a little thicker. Enjoy this delicious butter on toast, English muffins, or just right out of the jar. Be sure to refrigerate it, too.


Microwave Apple Butter
8 C peeled & cored apples (Granny Smith or Gala are best)
2 C apple cider or juice
1 1/2 C sugar
1 tsp. lemon juice
3/4 tsp. ground cinnamon
1/4 tsp. ground cloves
1/4 tsp. ground allspice

In a microwaveable bowl, mix apples and cider. Loosely cover and microwave for 12-15 minutes or until tender. Place mixture in a blender (if it is too juicy/syrupy, lessen juice) and blend until smooth. Return to a bowl and add sugar, lemon juice, and spices. Microwave for another 20-25 minutes, until it is thick and medium brown in color, stirring twice. Spoon into containers.

Stores in refrigerator for 3 weeks or in the freezer for 3 months.

Wednesday, September 21, 2011

Pie Crust Manju

Are those chocolate-filled biscuits? Nope--pie crust manju!
It's no secret that Japan is teeming with a scrumptious selection of sweet treats: Portuguese-inspired castella cakes, chocolate-stuffed butter biscuits stamped with Hello Kitty and other epically cute animals, and decorative blocks of jelly-like yokan, just to name a few.

But if there's one Japanese dessert you've got to try, it's Pie Crust Manju.

Imagine biting into a tender, buttery bun made of crisp, flaky pie crust. You then discover a generous dollop of sweet red bean paste, or an, cleverly hidden in the middle. Smooth, yet grainy, the an offers a gentle sweetness that marries perfectly with the slightly salty pastry shell. It's a modest, unassuming dessert. And it's something foodies and newbies will both like. After all, what can be so bad about pastry crust packed with sweet filling?

Traditionally speaking, manju is a small steamed cake filled with red bean paste, a cousin of another Japanese classic dessert, mochi. In Hawaii, they like to change it up a bit by baking manju and even making manju filled with sweet potato.

The recipe I used is from an old KTA supermarket ad that my grandma cut from the paper years ago. I used to love the Pie Crust Manju from the KTA bakery when I was growing up, so I thought it was only fitting to try their recipe. It doesn't produce exactly the same results, but gosh darn it, is it ever good. If you've ever made any kind of Asian dumpling or bun (manapua, siu mai, etc.), then you can definitely make this.


The one change I suggest is increasing the size of your dough balls. Although the recipe instructs you to make them golf ball-sized, I followed this step and ended up with a lot of extra dough. The manju then proceeded to crack open in the oven because there wasn't enough crust surrounding the an. Sad, but nonetheless tasty. I also omitted the egg wash at the end of the recipe just because I didn't have any eggs in the fridge. It's a skippable step, but the beaten egg will add a nice glossy sheen to the manju. Enjoy!


Pie Crust Manju

1 lb. (4 blocks) butter
1/2 C sugar
1/2 tsp. salt
5 C flour
3/4 C condensed milk
1 pkg. Shirakiku Brand Koshian or Tsubushian, 17.6 oz. (sweet red bean paste)
1 egg yolk (beaten)

Cream butter and sugar. Mix dry ingredients and add alternately with condensed milk. Shape dough into ball, size of golf balls. Then flatten and using a spoon fill with Koshian or Tsubushian. Cover completely and pinch underside to seal. Brush manju with beaten egg yolk. Place on ungreased cookie sheet and bake at 350 degrees (preheated) for 30-40 minutes or until slightly brown. Let cool.
Will make approximately 18-20 pieces.

Thursday, September 8, 2011

Chocolate Cake Batter Cocktail

Chocolate milk in a fun glass? Nope, it's a chocolate cake batter cocktail!

As a little one growing up in my mother's kitchen, I spent a good chunk of my childhood measuring flour and sugar, mixing dough with a wooden spoon, spilling flour and sugar, and generally getting in my mom's way. We would always use these yellow and green Tupperware measuring cups and this beautiful cream-colored ceramic mixing bowl with pink and blue trim, which was passed down from my great-grandmother.

Learning to bake in my mom's kitchen!
Like any kid, however, I knew the best part about baking was licking the spoon once our cakes and cookies were in the oven. (These were the days before we all bit our nails over salmonella poisoning possibilities.) Now, as an adult, I'm able to resist the temptation to eat cake batter right out of the bowl. But that doesn't stop me from enjoying a good chocolate cake batter cocktail.

That's right...I said chocolate cake batter cocktail. It's love at first sip. Taking my inspiration from the Cake Batter Martini at How Sweet It Is, I mixed together a lovely little concoction made of rum, creme de cacao, heavy whipping cream, Godiva chocolate liqueur, and--you guessed it--UV Cake vodka! Pour it all into a dainty martini glass rimmed with cream cheese frosting and nonpareils, and you've got the answer to all of your sinful cravings.


Now, I must warn you--as sweet and cutesy as this liquid indulgence seems, it packs a heavy punch. Slurping and chugging are not advised, and please enjoy in moderation. Feel free to mix and match your flavorings, too--spiced rum with buttercream frosting and chocolate sprinkles, for instance. Here's my recipe so you can try it out and decide what your tastebuds like best:

Chocolate Cake Batter Cocktail

1 oz. rum
1 1/2 oz. UV Cake vodka
1 1/2 oz. creme de cacao
1/2 oz. Godiva chocolate liqueur
1 oz. heavy whipping cream
Frosting of your choice
Rainbow sprinkles or nonpareils

Generously fill cocktail glass with ice. Pour ice into cocktail shaker. Dab frosting around rim of glass using a small spoon or spatula. Pour sprinkles onto a plate or shallow dish and press frosted glass rim into sprinkles. Gently press sprinkles with your finger to ensure they stick. Pour remaining ingredients into cocktail shaker and shake together until the outside of the shaker condenses. Strain into cocktail glass.

Thursday, September 1, 2011

Neapolitan Ice Cream Cookies


Seeing as we're sitting on the cusp of autumn, I've begun thinking about transitions--shutting off our water sprinklers for the winter, replacing our cotton bedspread with our puffy down comforter, and tidily tucking away our tank tops and shorts until the sun peeks out of clouds again. It's the perfect time to segue from ice-cold ice cream to warm, home-baked ice cream cookies, like these delicious Neapolitan Ice Cream Cookies!

Who wouldn't love a fresh batch of these colorful, yummy cookies, their three buttery layers dressed up with hints of chocolate and almond? Tender and chewy, Neapolitan Ice Cream Cookies are just what you need on those harsh winter days when you've got a sweet tooth, but it's just too darn cold for frozen treats. Plus, they're super easy--and fun!--to make. All you have to do is create a single cookie dough, split it in thirds, add the appropriate coloring, place the dough in nice, even layers, refrigerate, slice, and go! The dough can be made a day ahead and refrigerated until you're ready to bake. Kids of all ages are sure to "wow" at the tri-colored strata, making it an excellent choice for birthdays, holidays, or anydays!

Here's the link to the recipe, from Betty Shimabukuro's "By Request" column in the Honolulu Star-Advertiser. I previously mentioned these cookies in my post about Italian Rainbow Cookies. Enjoy!

Monday, August 15, 2011

Zooper Cute Carousel Cake

Hey all! What's baking?

First of all, I apologize for the lack of updates--my summer has been crazy busy and chock-full of travel, work, and family events. Hopefully, this is the start of a more normal blogging routine.

Earlier this summer, we threw my adorable nephew a fantastic, fun-and-food-filled first birthday party. My in-laws prepared the majority of the main meal: cheesesteaks, hoagies, pizza, salad, etc. Luckily for me, I had the honor of baking the best little birthday boy ever his first little birthday cake ever!

I wanted my nephew's cake to be something cute, whimsical, and representative of all of the joys of turning one year old. After discovering these adorable cupcakes on my Betty Crocker recipe app, I knew exactly what I would bake: a giant carousel cake complete with rainbow sprinkles and adorable animal cracker figures!

My nephew celebrating with a slice of cake
I decided to wing it and recreate this edible merry-go-round on a larger scale using my favorite cake and frosting recipes, allowing for one white cake layer and one chocolate layer. However, any good cake and frosting combo will do (even store-bought or packaged mixes), so try this with strawberry, coconut, red velvet, or Funfetti cake and dress it up with chocolate or cream cheese frosting. The chocolate pudding layer can also be substituted with custard, extra frosting, or another pudding flavor.

 The sky truly is the limit with this super fun cake. I used plain Barnum's Animal Crackers for my creation, but it's more than OK to use iced animal crackers, animal-shaped cookie cut-outs, or even plastic animal figurines instead. Remember: carousels (and this cake) are meant to be fun and playful; let your creativity take over and shine.


Zooper Cute Carousel Cake 

Ingredients:
1 10-inch white cake
1 10-inch chocolate cake
1 3.75-oz. instant chocolate pudding
Frosting (any color)
1 2.125-oz. box animal crackers
Pretzel rods
1 C semisweet chocolate chips, melted
Multicolored sprinkles, jellybeans, chocolate-coated candies, or other decorative candies
Plastic drinking straws
10"x10" piece scrapbook paper

Place chocolate cake on cake tray or cake carrier. Prepare chocolate pudding according to package directions. Spread thin layer of pudding on top of chocolate cake (there will be extra pudding). Gently center white cake on top of pudding layer. Spread frosting over top and sides of entire cake. Gently shake sprinkles over top and sides.

That's the way the cake crumbles!
Open box of animal crackers and discard broken animal crackers. Arrange whole animal crackers on a clean baking tray face-down. Melt chocolate chips in microwave, about 1 minute. Working one at a time and using a small spoon, dab a small amount of melted chocolate onto the back of each animal cracker and immediately place a pretzel rod vertically onto the chocolate. Press gently to ensure pretzels stick firmly to chocolate. Let completely dry for 20-30 minutes.

Once animal figures are dry, arrange them in an evenly-spaced, circular pattern around the perimeter of the top cake layer. Animal faces should be facing the outside of the cake while the pretzel rods should be toward the center of the cake. Decorate with jellybeans, chocolate-coated candies, etc. as you wish.

Use a compass to draw as large a circle as possible on scrapbook paper. Cut out circle. Cut a slit into the middle of the circle. Fold paper into a cone/tent shape and tape together. Tape plastic straws to center and sides of paper tent. (These will be the "support beams" for the carousel tent.) Carefully place paper tent on top of cake, gently sticking straws deep enough into the cake so that the tent will not fall over.

Voila--you've got a zooper cute carousel cake!

Saturday, June 25, 2011

My First Cake Sale!

I'm so excited, guys 'n' gals! I just sold my first pre-ordered, full-sized cake! It was a delectable devil's food cake with chocolate ganache and marshmallow cream filling for a woman who enjoyed my cupcake version of this sweet treat so much, she just had to have a larger version for her birthday.
 
I am very grateful for this opportunity to showcase my baking and get a little boost into the baking business. It makes me happy to know that my cake is being used for a special occasion and that in some small way, I may have brought a bit of joy to someone. Hopefully the cake was a hit and they'll be back for more! :)

Tuesday, June 21, 2011

Italian Rainbow Cookies

Hello fellow bakers and cakers!

Since I was a little kid delighting in bowls of Neapolitan ice cream in front of the TV, I've carried on a love affair with multicolored, layered desserts. Whether it's a refreshing yogurt parfait, a pretty diamond-shaped Girls Day mochi, or my mom's famous fruit trifle, I've always been enamored by the dainty, whimsical presentation of layered sweets.

And that is exactly why I have been dreaming of Italian Rainbow Cookies for months. These flashy petite treats contain all the goodness of almonds, dark chocolate, and fruit preserves baked into seven adorable layers, that, when stacked together, resemble the Italian flag. This unique combination of main ingredients makes for a complex and sophisticated cookie with a distinctly European flavor. It's the type of thing you can picture your archetypal Italian-American grandmother baking with love for family get-togethers.

So how did I sink my sweet tooth into this fanciful, half-cookie, half-cake, you ask? It all started when I was talking to my mom about the different desserts we bake fresh at T.O.P.S, and she suggested creating a "signature" dessert for which our restaurant could become known. Before I could say "Jumping Jellybeans!" Mom was mailing me all manner of sweet inspiration, both from local newspaper clippings and her own recipe collection.

One recipe for Neapolitan Refrigerator Cookies, cut from Betty Shimabukuro's "By Request" column in the Honolulu Star-Advertiser, stood out in particular. Although this recipe was for a tri-colored slice-and-bake cookie, the column also mentioned a more elaborate, almond-fruit preserve cookie enrobed in melted chocolate.The idea stuck in my mind.

A few weeks later, I stumbled upon the lovely Italian Rainbow Cookie Cake on one of my new favorite blogs, Always Order Dessert. I was intrigued to learn that the blog's author, Alejandra Ramos, got her foot in the door of the baking business by selling dozens of these extraordinary cakes. My curiosity was piqued; this kind of stuff just had to be good.

I finally realized Fate was bringing me together with these awe-inspiring cookies when I re-opened my May 2011 issue of Bon Appetit ("The Italy Issue") and found yet another recipe for them! You can find their recipe for Italian Rainbow Cookies, which I ultimately used, here.

To tell you the truth, I was nervous about baking Rainbow Cookies. With all of the beautiful examples that had come before me, I had a lot to live up to. In between all of the mixing, melting, freezing, stacking, pressing, and my lone 9"x13" pan, I was also looking at an all-day baking project. And most of all, Steve, my primary taste tester, isn't much of a marzipan or almond extract person, so I wasn't sure he'd go wild for them. In the end, however, the cookies baked up splendidly and I had a blast! The cookies were dense and moist, with a slightly spongy texture and nice, even layers. Although I don't see myself making these glittery little gems on a regular basis, they might reappear in my kitchen over the holidays. As they say in the cooking world, it was love at first bite.