Tuesday, May 17, 2011

Tomato Sauce Cake

First and foremost, today I'd like to wish my wonderful husband, Steve, the BIGGEST and BEST birthday ever! On Sunday, we threw him a fun-filled surprise party, complete with friends, family, eats, and sweets. Happy Birthday, Honey!

It's lucky that we had the party when we did, because here I am, two days later, stuck in bed with an awful cold. After spending the past thirty hours either sleeping or watching movies on Lifetime, I dragged myself downstairs and attempted to salvage part of the day by blogging. 

So here we go--this is how I finally got around to writing about a heritage recipe for Tomato Sauce Cake belonging to my Grandma T. As a child, I grew up identifying my grandmother with many warm, joyful things: the aged, pea green futon I'd take naps on at her house in the afternoon, the thrill of watching her soybean plants clamber toward the sky, the unbeatable taste of a lunch made up of chicken noodle soup and saloon pilots with guava jelly for dessert. If there is one thing I learned from my grandma, it's the philosophy of simple goodness: that the best things in life are the little things, and that a recipe need not be frou-frou to make an impact.

That's where the Tomato Sauce Cake comes into play. Sweet, moist, and with a tender crumb, this cake imparts a delicious--albeit puzzling--flavor. Resting amongst the branches of pumpkin, spice, and carrot cakes in the baking family tree, it's no wonder that Tomato Sauce Cake is sometimes referred to as "Mystery Cake," according to the good folks at www.foodtimeline.org.

When I first discussed the recipe with my friend Frannie, she mentioned that it seemed like an old Depression-era recipe, the kind of thing home bakers would make when chocolate and cream were luxuries. The idea made sense. Grandma's recipe lists very basic ingredients, things that most housewives of her generation would keep on hand. There are no nuts, raisins, or coconut flakes to dress it up. While other similar recipes call for a can of tomato soup, my grandmother's calls for watered-down tomato sauce. Although I imagine this cake would be terrific when topped with cream cheese frosting, all I gave it was a slight dusting of powdered sugar, because Grandma didn't include a frosting recipe. Come to think of it, most of my grandmother's cakes don't have frosting.


Here's the recipe. It just lists the ingredients necessary, as well as the baking time and temperature. In conducting previous cookery research, I've discovered that many old-time recipes (we're talking colonial America here) didn't include detailed instructions for preparing dishes because it was assumed (due to traditional gender and family roles) that the reader was skilled enough to know most prep techniques and to understand the implications of a recipe. I'm guessing the concept is similar with Tomato Sauce Cake--perhaps my grandmother jotted down the recipe from a friend or neighbor, simply writing down the ingredients because the order and method of preparation were inherent to her. Whatever the reason, she deserves to be thanked for this recipe and for teaching me the value of sweet simplicity. Thanks, Grandma!!

Tomato Sauce Cake
1 C margarine or butter
2 C sugar
4 eggs
1 8-oz. can tomato sauce blended with 3/4 C water
3 C flour
1 tsp. baking soda
1 T baking powder
3/4 tsp. cinnamon
1/2 tsp. cloves

Bake at 350 degrees for 30 minutes.

Sunday, April 24, 2011

Koulourakia

 
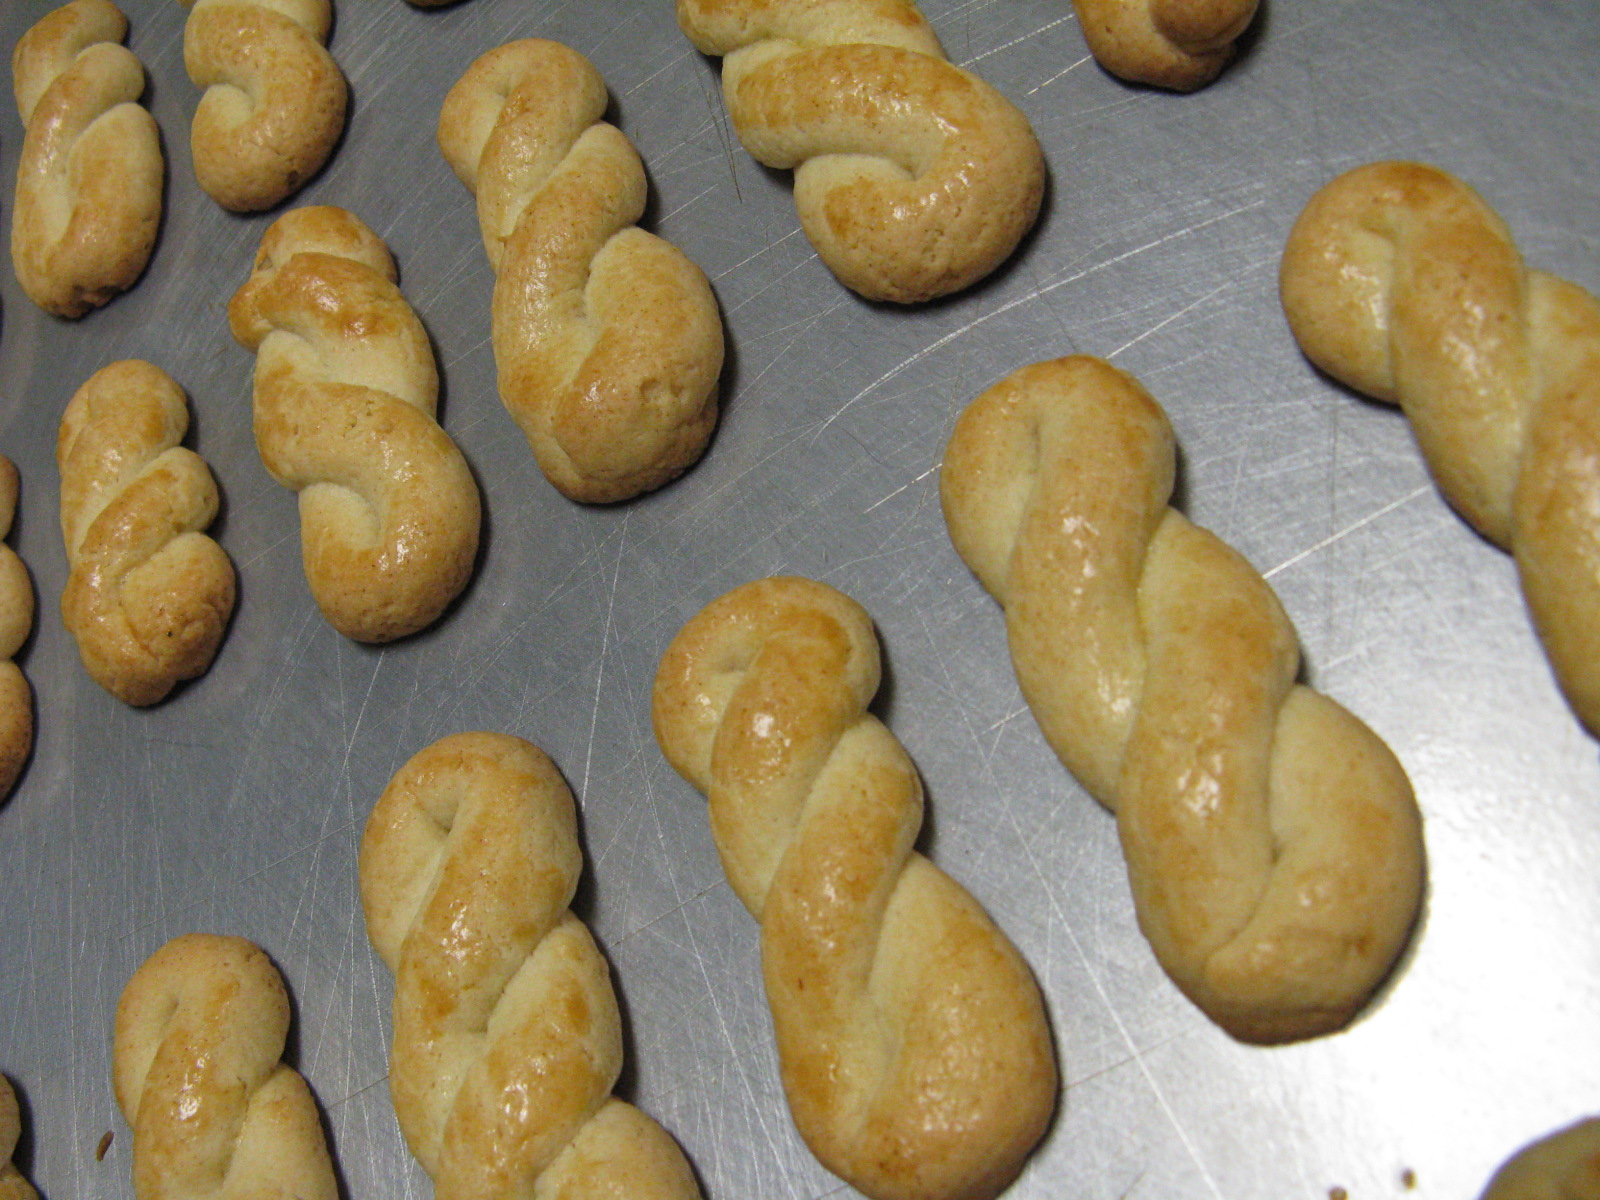
Happy Easter, everyone! In celebration of this special time of year, I baked a batch of koulourakia, a traditional Greek Easter cookie. Hand-rolled with just a touch of sweetness, these elegant little butter cookies go perfect with tea or coffee. As my husband explained it, they can be shaped into just about anything: circles, eights, braided ropes, etc. They were a lot of fun to make, but I imagine that braiding 7 dozen of these cookies by myself would be time-consuming! Thankfully my husband and father-in-law agreed to pitch in and help.

Here is the recipe, courtesy of a Greek church cookbook that belongs to my mom-in-law. The sesame seeds are optional.

Enjoy and happy baking!

Koulourakia

1 1/2 C butter
1 1/2 C sugar
2 eggs
5 1/2 C sifted flour
4 tsp. baking powder
1/2 tsp. baking soda
4 T water
2 tsp. vanilla

Cream butter and sugar until fluffy in electric beater. Beat in eggs and flavoring. Add half the sifted dry ingredients, and mix well. Add water to mixture, together with remaining flour. Knead slightly. Pinch off pieces of dough and roll into pencil-thin strips, about 6 inches long, fold in half and twist into a rope. Place 1 inch apart on ungreased cookie sheets. Brush with beaten egg, and sprinkle with sesame seeds. Bake in moderate oven (350 degrees) about 15 minutes, or until lightly browned. Makes about 7 dozen.

Friday, April 1, 2011

Choco-Vanilla Ice Cream Sammies

So I started with a batch of chocolate wafers and ended up with a stack of ice cream sandwiches--Choco-Vanilla Ice Cream Sammies, to be precise!

One afternoon, I was bored and looking for something I could bake with the ingredients I had right around me. Thank goodness for this lovely little recipe from Joy of Baking! As I sliced through the dough and began placing these petite, albeit plain, chocolate cookies on baking sheets, I wondered how I could jazz things up a bit. Then I remembered there was vanilla ice cream in the freezer and rainbow sprinkles on the shelf--perfect!

After the cookies were cooled (and after taste-tasting a few samples), I halved the batch and used a small ice cream scoop to add 1 1/2 scoops of ice cream on top of one half of the wafers. I then sandwiched the ice cream between another wafer and gently pressed down so everything would stick together. I left some of the ice cream sammies as is, but decided to shake some sprinkles onto a few of them for that extra dose of fun. All in all, they were a great treat and one that I hope will reappear in the summertime!

Wednesday, March 9, 2011

Green Onion Dressing Salad


Hey friends! The other day, my husband and I were craving something healthy, so we decided to temporarily ditch the sugar and spice and "go green" with a tasty Green Onion Dressing Salad served with homemade roast beef panini. We ended up with a fast, light meal that was as easy as pie to prepare. 

Things I loved about this recipe:
  • Other than the pomegranate (which I couldn't find), it uses basic ingredients that you may already have in your pantry or can easily pick up at the market
  • It makes about 8-10 salad dressing portions, so you can always refrigerate the leftovers (and trust me, you WILL want to save the leftovers!)
  • The dressing is versatile and tastes great not only with the veggies listed below, but also on other mixed greens, etc. Try it on a salad with pears, apples, or strawberries. We used some of our leftover dressing on a terrific taco salad with steak.
Here's the recipe, courtesy of 80 Years of 4-H Cooking in Hawaii:

Green Onion Dressing Salad

Dressing:
Taco Salad with Steak
1/3 C sugar
1 tsp. salt
1 tsp. prepared mustard
1/2 tsp. pepper
3 sprigs parsley
1 sm. bunch green onions
1/2 C white wine vinegar
1 C salad oil

Salad:
Lettuce
1 C canned mandarin oranges
Pomegranate
Red onion, sliced thin
Avocados, sliced
Sliced almonds

Blend dressing ingredients in electric blender. Mix salad ingredients; add dressing and toss. Happy cooking!

Monday, February 21, 2011

Melting Moments with a Twist

Until just a couple of days ago,Old Man Winter surprised all of us here in Minnesota with some unseasonably warm weather, allowing us to temporarily hang up our coats and defrost our toes. To celebrate this wonderful February thaw, I baked a batch of Melting Moments:


Made from a simple, shortbread-like dough, Melting Moments go by many names, each with its own slight variation: Snowballs, Russian Tea Cakes, Greek Kourambiedes, Mexican Wedding Cakes, etc. Most types call for some kind of chopped nut and instruct you to roll each cookie in powdered sugar. But I wanted something a little bit different.... I thought, "If you can roll these cookies in confectioner's sugar, why not roll them in coconut flakes, graham cracker crumbs, or sprinkles, and skip the nuts altogether?"

Here's the recipe I came up with, adapted from Jean Watanabe Hee's Hawaii's Best Local Desserts book:

Melting Moments with a Twist

1/2 C butter or margarine, softened
1/4 C powdered sugar
3/4 tsp vanilla
1 1/8 C cake flour
Sprinkles

In a medium bowl, beat butter and sugar until well blended. Add vanilla and beat well. Stir in flour; mix well. Form into 1-inch balls. Pour sprinkles onto a plate or flat work surface. Roll each ball in sprinkles until thoroughly coated. Place on lightly greased baking sheets. Bake at 350 degrees for 15 minutes or until lightly browned. Remove from baking sheets and cool on a wire rack.


I ended up with a plateful of tender, buttery cookies that literally melted in my mouth! The sprinkles made them look extra fun and added to their appeal. You can even divide the dough and mix food coloring into them to create a cookie rainbow. For bite-sized cookies, make each dough ball 1/2-inch or so in size, because the sprinkles will increase the cookie's circumference. (Just be sure to decrease the baking time by a few minutes.)

Also, Happy Belated Valentine's Day! Here are some pics of the red velvet cupcakes I whipped up for our three-course V-day dinner at the restaurant. They turned out great--soft, silky smooth texture, just sweet enough, and fairly quick to prepare. Happy baking!

Friday, February 11, 2011

Cherry Cheesecake Cupcakes


Yay! This is my first recipe-related blog post! One of my favorite treats to bake is the cupcake, and our restaurant, T.O.PS. Pizza and Hoagies, sells some of my creations. We always keep a stash of carrot cake cupcakes on hand, and offer seasonal varieties too. So far, I've baked batches of chocolate, vanilla, and red velvet cupcakes, and decided it was time to mix things up a bit with cheesecake cupcakes!

Now, I love "The Golden Girls," and can chow down a cheesecake just as quickly as Dorothy, Rose, Blanche, and Sophia. (Well, maybe not exactly--that would give me an epic tummyache!) The thing is, I'm not too experienced with baking cheesecakes. This recipe, however, reminded me a lot of these Miniature Cheesecakes I made during my high school 4-H days, so I thought I'd give it a shot.

The first time I made these, they turned out terrible! I was left with a pile of cracked cream cheese, liquidy sour cream topping, and a mushy mess that mostly ended up in the trash. :( The only saving grace was that they tasted great! 

I couldn't let this cupcake disaster defeat me; with a few minor tweaks, I knew I could get this recipe to work. A few days later, I tried again, and the results were times better! The first major change I made was to allow the cream cheese to soften longer, which eliminated the cracking. The second change I made was to immediately remove the cupcakes from the oven after allowing the topping to set for only 5 minutes. After cooling the cupcakes on a table for about half an hour, I popped them into the fridge, where the cakes and topping could firm.

 The result? Yum! The lesson learned? If at first you don't succeed, bake, bake again. :)

Thursday, February 10, 2011

Aloha & Welcome!

Thanks for stopping by my *brand new* baking blog! I've thought about starting this blog for quite some time now, and finally decided to go for it! My goal is to use this space as a way of sharing my kitchen messes and successes with friends and family I don't see often enough, and spread some sweetness to others.

Although I sell some of my baked goods at our family restaurant, I don't consider myself a "baker," just a baking enthusiast. I love trying, creating, collecting, and experimenting with recipes. Maybe some day I'll even invent some of my own!

So why "The Shortcakery," you ask? Back in my college days, I worked at a Girl Scout camp under the nickname "Shortcake." The name has stuck, to a certain extent, and I'd probably still respond to it. I also absolutely adore strawberry shortcake (both the dessert and the American Greetings cartoon character).

I hope you enjoy your visit today and check back often for more posts, pics, and recipes.